 I wanted to design a computer case that could function as a table, and make it easy to modify and upgrade the system. This is what i came up with.
The Table is made out of clear Duraplex acrylic sheets. Similar to what impact modified windows are made out of.
 The table has 2 case fans, one below the hard drives near the bottom and the other up on the front. The case has a positive air flow so air filters are need on the bottom intake and in front of the front fan. The air is then pushed out through the power supply and the top back behind the cpu. You will notice that most computer cases have the outtakes close to parts that give out the most heat. In this design the air flows quickly without making any hot spots (areas were air gets trapped and does not move).
Proper air flow is the most important thing when designing cases. Bad air flow can reduce the life of your system, and cause noise. Dirt and dust can also build up which causes more heat and your fans to make more noise.
In this design the air moves in one direction bottom to top, keeping it cool and noise free.

One thing that always bugged me with standard case with how the motherboard is on its side. What the person that put together your system didnt notice that the cpu heat sink wasnt properly attached, or broken? with the mb on its side the heat sink would break off. Without the heat sink a cpu will fry in less then 5 seconds. the main reason mb's are placed vertically is to prevent dust and dirt from building up on the components. Since this design has a positive air flow with filters, we dont need to worry about dust. I personally feel better being able to see the motherboard in the horizontal position.
 With this project I tryed to design the case with the minimum amount of materials needed. This makes it less expensive to build, easier to build, and faster to build. I sure that if anyone of you chose to build a case like this, you could cut its matireal needs even more.
 As i said in the begining, I wanted to design the system to be easy to upgrade or fix. This is what i came up with. All the computer part are attached to the inner core, some might call it a computer core. The inner core rests on the inside corners and can be removed all in one piece through the top. You only need to unplug one of the case fans and cable in the back. once the core is removed you can plug it in and turn it on with all component easy to access.
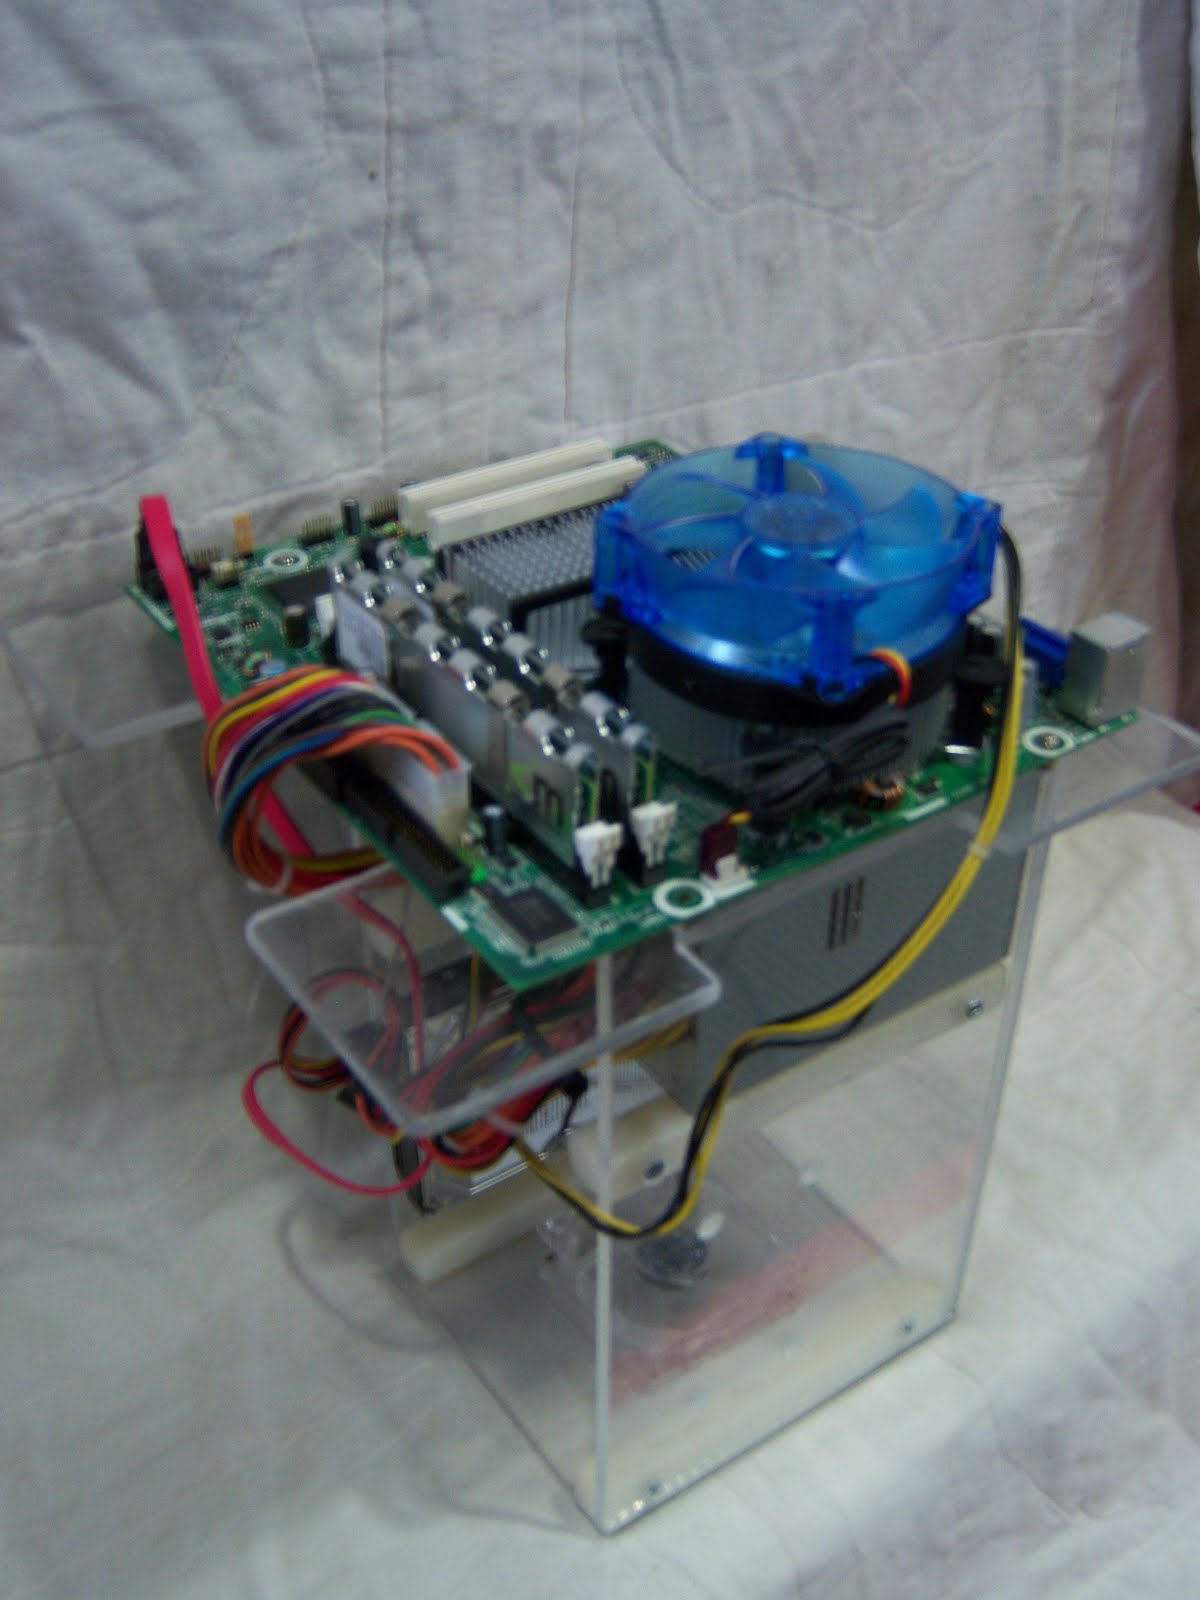 Cables can come up through the front or sides. I recommend the front though, the side indents are more for your hands when removing the core.
Placing the power supply under the motherboard ensures that all standard cables can reach their destination. It also makes the power supply less visible. The leased attractive part of the system in my opinion.
 Another thing that bugged me with standard case designs was how cables are place, more often not placed it a better way to put it. to fix that I placed a gap between the power supply and the motherboard. It is the area that extra cables seem to be located. This also hides them and preventing them from disrupting the air flow.
 I designed the system with support for only 2 hard drives. with the popularity of network drives and products like the drobo, and terabyte drives, 2 is more them enough.
You might noticed that the system doesn't have a CD-rom drive. I personally use an external one for the rare times i need it. CD-roms are going the way of the floppy drive from what i have seen.
This project is still unfinished. I am thinking of installing a usb port and card readers on the front under the top of the table. also I need to modify it to support video cards and PCI cards.
Thanks for taking the time to checkout my project. And if anyone builds a case similar to this, I would love to see it. This design can definitly be improved. and i would love to see your modifications.


No wonder why you get so many feedbacksarticle source
ReplyDelete